Tuesday, February 28, 2017

Sending Love

I've made a card today, using the Simon Hearts Align die a little differently...I used only three of the five hearts in the die...
I layered the outline as well as the inside hearts of the die, and added three colored paint chip hearts to cover the inside layers.   I dotted the card with three enamel dots made with enamel accents.  The sentiment is from the Simon stamp set, Hydrangea Blooms.  Here's a close up...
Sweet and simple, that's the way..uh huh, uh huh, I like it....😆!!  Thanks for visiting me today!! Hugs!! Lisa


Thursday, February 23, 2017

Elegant Roses

I used on of the Simon Says Stamp Elegant Roses dies and one of the new Partial Cut leaves to make a thank you card...
I die cut the roses and layered...filling them with...what else...paint chips(I'm in love, what can I say!  Hey, for flowers like these, shades of the same color are perfect!).  I embossed the rose die onto the card panel three times for the positioning of the die cut leaves...the dies only partially cut the leaves(like their name says:)!), so they are left ON the cardstock.  Here's kind of what it looked like, on one I decided not to use...
It's nice to have a visual of the flowers, so you  can know where to die cut the leaves.  I used the "thanks" stamp from the Simon set, Thankful Heart., then put a piece of green cardstock behind the die cut leaves for their color.  Here's a close up...
I take Noah to the local botanical gardens whenever the day is nice...they have a HUGE rose garden...can't wait til they begin to bloom...my favorite flower in the whole wide world!!  Thanks for visiting me today!! Hugs!! Lisa

Wednesday, February 22, 2017

Old Border Dies with New Sentiment Dies

I didn't realize when I made these cards I'm sharing with you, that the Simon Says Stamp border dies are no longer available...so sorry, I seem to live in my own little world sometimes!!  But... I thought that many of you may have these border dies, and it's always fun to play with old dies...and then I've combined them with newer sentiment dies that ARE still available...and RAINBOWS, paper and paint!!...
  I used eight different strips of paper, much longer than the panel, so when they get bent, you pull them through until the bent, scraggly ends are no longer part of the weave.  I die cut the Simon Painted Thanks die and layered.  Here's a close up...

The second card uses the Simon Air Vent die with paint chips...
 One cool thing I realized with this Simon Thinking of You die from the Handlettered Greetings die set...the dots for the "i's" are super tiny.  SOOOO ... so I had a thought...I used my white Enamel Accents and dotted the "i's" with that!  I worked perfectly...Ok, the first one is a little larger, but if you practice a bit, you'll figure out how to make the dots small...I pressed down too hard for the first "i", but I wanted you to see them both..but...a cool idea rather than the tiny paper pieces that dot those "i's".  Layered the sentiment and filled the vents in with different colored paint chips...
Ok..so much fun...Thanks for visiting me today!! Hugs!! Lisa

Friday, February 17, 2017

Leaves Turned Hearts

I know we've just come off Valentine's Day...but hearts are for everyday!!  I used one of the Concord and 9th layered leaf dies that has always looked like a heart to me, and combined it with one of my favorite sentiment stamps from the My Favorite Things Geometric Greenery stamp set, which goes perfect with hearts, to make an everyday thank you card...with the leaves turned hearts...
Here's what the die, die cut, and die cut cut look like all next to one another...
I layered the three die cuts twice each, then...after coloring the bottom 3rd layer that still had the pieces in it, with markers, decided I didn't like how it looked, so I filled in all three "hearts" with different pink and kraft colored die cut paint chip pieces .  Here's a close up...
Thanks for visiting me today!! Hugs!! Lisa

Thursday, February 16, 2017

CAS(E) this Sketch...Happy Birthday Handsome

I am so thrilled and honored to be a guest designer this week over at CAS(E) this Sketch!!  Thank you so much, Chrissy for the invitation...I love CAS(E) this Sketch!!  
 I made a birthday card for this week's sketch challenge with a Simon sentiment die, a Hero Arts sentiment stamp, and some paint chip strips!  Here's my card and the sketch...

I used the Impression Obsession Cover a Card- Birthday Words for the background.  I stamped that in Simon Fog ink, through a torn piece of paper that served as a mask.  I used strips of paint chips, adhered to a thin piece of cardstock for my "Happy Birthday", then die cut and layered. This Simon Painted Happy Birthday die is one of my favorite...great for gal AND guy cards!!   I added a piece of a Hero Arts sentiment stamp to go under my die cut sentiment, and then some enamel dots to make it a little more fun.  Here's a close up... 
Hope you will have just as much fun as I did with this week's sketch!  For more inspiration, make sure to check out the CAS(E) this Sketch! blog to see how the design team interpreted and created with the sketch!!  Thanks for visiting me today!! Hugs!! Lisa

Tuesday, February 14, 2017

Love Notes

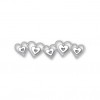
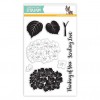
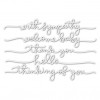
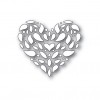
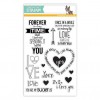
Happy Valentine's Day...hope your day is "love"ly!    I made four square cards(4 1/4") ...I've deemed them love notes, with the Simon Says Stamp Corbel Heart die and "Love"sentiment stamp from the Love and Quotes set...


The first one, I die cut and layered underneath the top panel two layers of the corbel die, then die cut a red heart and put into the corbel dies.  I used the "Love" sentiment stamp on all four cards and the same stitched square die, as well...
Here's a close up...

The second one, I die cut the die on a piece of acetate, and made a stencil.  I sponged two shades of pink through the stencil, and then used Enamel Accents to dot the sponged corbel...
here's a close up...

The third one, I embossed the heart onto the white stitched panel, then sponged onto the embossed(raised) corbel, again, through the stencil...
Here's a close up...

You KNOW I couldn't make a set of cards without a rainbow!!  I embossed the corbel on a piece of watercolor paper, to be able to see where to paint color, then used a waterbrush and paints, and colored the heart.  I then layered underneath the white panel with 2 more corbels, and voila...rainbow heart...
here's a close up...
Let someone know you love them today...maybe a few people!! 
Thanks for visiting me today!! Hugs!  Lisa